Remote File Protection
This tutorial is for Remote File Protection. If you are looking for Onsite (on-server) File Protection, click here.
FastMember Remote File Protection Overview
Rather than uploading files to the same WordPress server, you can host them elsewhere (such as Amazon S3) and link those files to your system securely using the FastMember Remote File Protection System.
For the purpose of this tutorial we will be considering Amazon S3 storage. However, the FastMember Remote File Protection supports all major storage service providers and the process is similar.
By default, your WordPress website does not have secure access to AWS S3 buckets, by using Fast AWS add on you can integrate your website with AWS securely using AWS S3 API. This is a must if you need to access remote files on AWS. If you have not already, please follow the Fast AWS guide here before continuing with the tutorial below.
Creating a S3 bucket on Amazon AWS
Amazon S3 is the storage solution by Amazon AWS. The steps below will guide you through setting up an Amazon S3 storage bucket. If you already have a bucket created you can skip this section.
Step 1
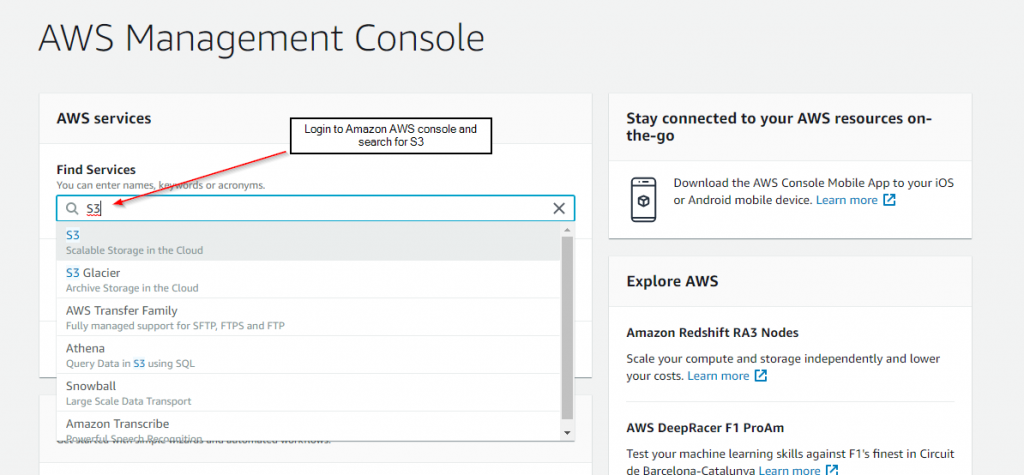
Login to the Amazon AWS console and search for S3 in the find services field.
Step 2
Click on the Create bucket button.
Step 3
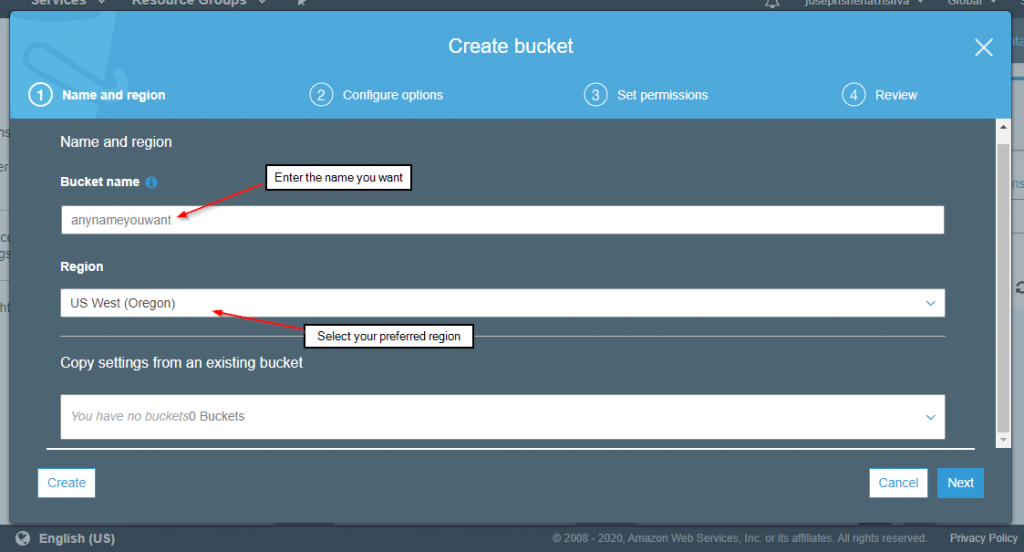
Give a name for the bucket and select your preferred region. Once you are done click next.
Step 4
Default settings work fine on this page. Simply click next if you don’t have a requirement to change any settings on this page.
Step 5
Review the options you’ve selected for the S3 bucket and when you are satisfied click Create.
Uploading Files to a S3 bucket on Amazon AWS
Now that you have created a S3 bucket, you need to upload files to it. You can skip to the next topic if you have already have files uploaded to S3.
Step 1
Click on the bucket you just created to go inside it.
Step 2
Click on Upload.

Step 3
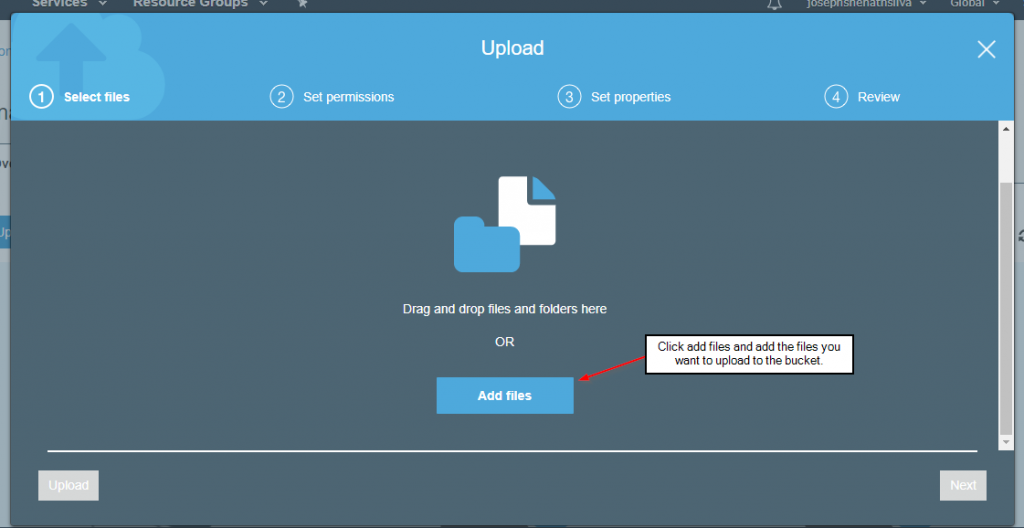
Click on Add files and select the files you wish to upload. Then click Next.
Step 4
On this page you can set individual access for files. However, if no specific requirement is there you can simply click next.
Step 5
Click upload to get the files uploaded. It might take some time depending on the file size and the number of files you are uploading.
Linking files on S3 bucket to FastMember Remote File Protection
Once files are uploaded into the S3 bucket, you need to get the file paths of the files you need to link to FastMember remote File Protection System. Although there are various methods in getting file paths, the steps below will guide you in getting the files paths directly through the AWS Console and using CyberDuck.
Copying links using Amazon Console
Step 1
Navigate inside the S3 bucket you have files stored and click on the file you wish to link to FastMember Remote File Protection.
Step 2
Scroll down and copy the Object URL.
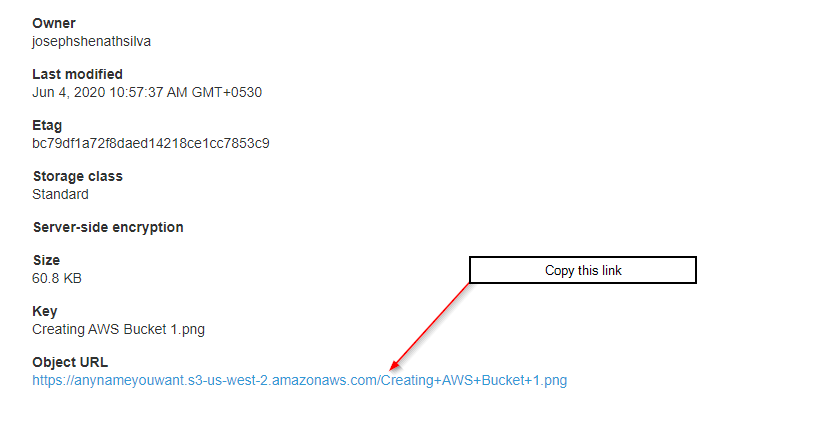
You need to do this for each file you wish to add to remote file protection system.
Copying links using CyberDuck
Advantage of using CyberDuck application is that it allows you to copy links of multiple files at once.
Step 1
Open CyberDuck and connect to your S3 bucket.
Step 2
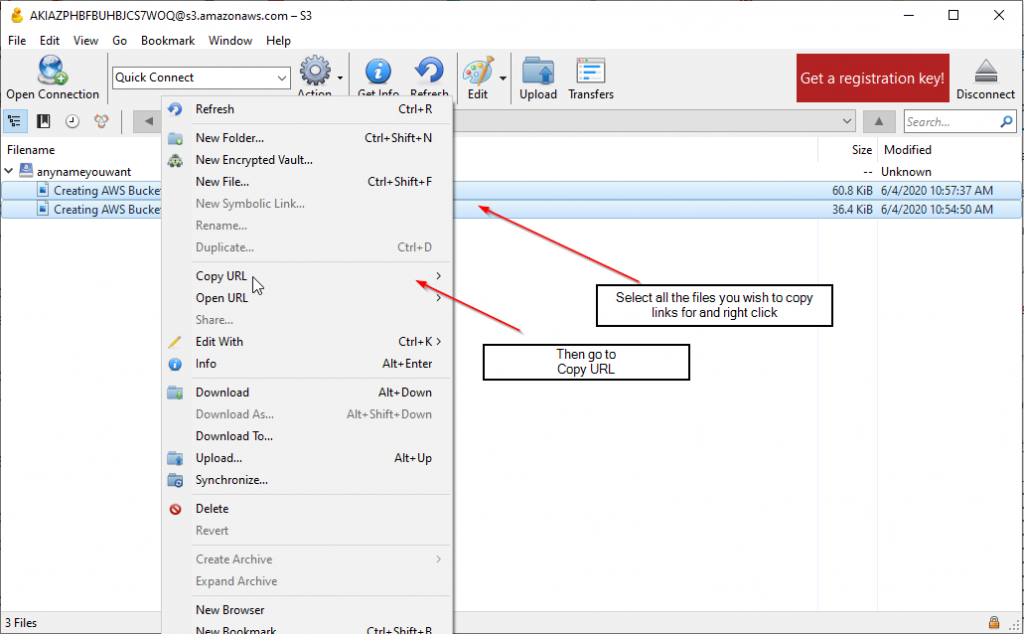
Select the files you need to copy links of. You can do this by clicking on files while holding the ctrl button down on the keyboard.
Step 3
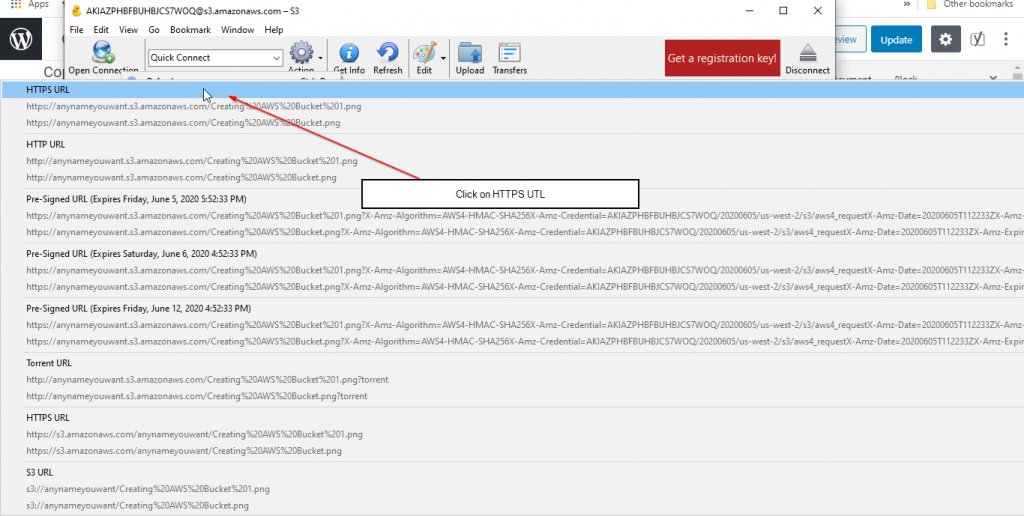
Right click on the files and go to copy URL, then in the box that opens click copy https.
Pasting links on Remote Content Protection
Step 1
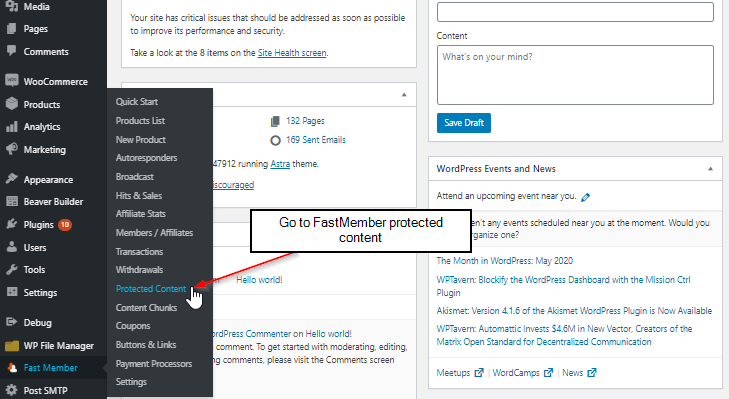
Go to FastMember Protected Content and select the product you wish to edit.
Step 2
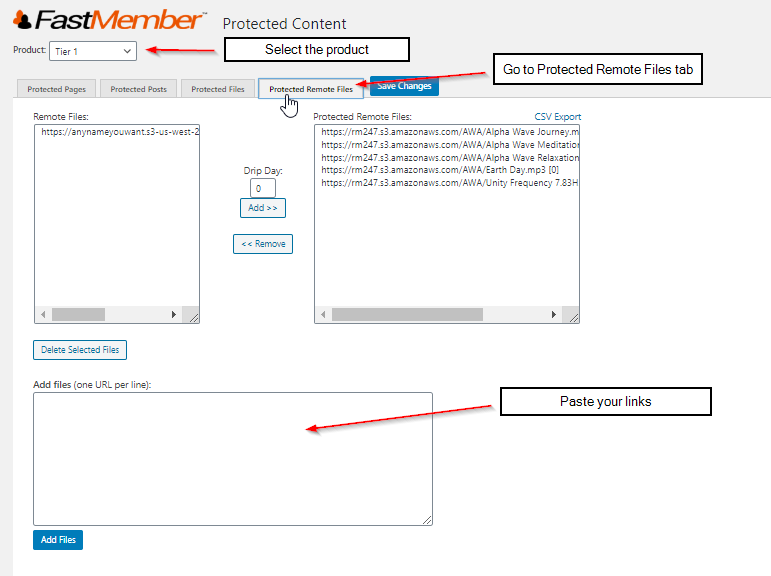
Go to the Protected Remote Files tab and paste the link/links in the Add Files field. If you are adding more than one file at once, make sure to insert one link per line. Finally click ‘Add Files’.
Adding the files to a web page is similar for all protected content. It is described here on Adding Protected Files To A Page tutorial.
Feel free to let us know if you have any issues or concerns using any of our products by reaching us through the support page.
