GetResponse Integration
How to Install and connect Fast GetResponse with GetResponse
GetResponse is a comprehensive marketing software platform that helps you create content, boost sales, and increase traffic to your website.
This tutorial will show you how to set up Fast GetResponse to add your Fast Member subscribers and customers to a list inside GetResponse.
By using Fast GetResponse with FastMember products, you can create dynamic email lists and keep track of your subscribers.
How to install the Fast GetResponse add-on
Step 1
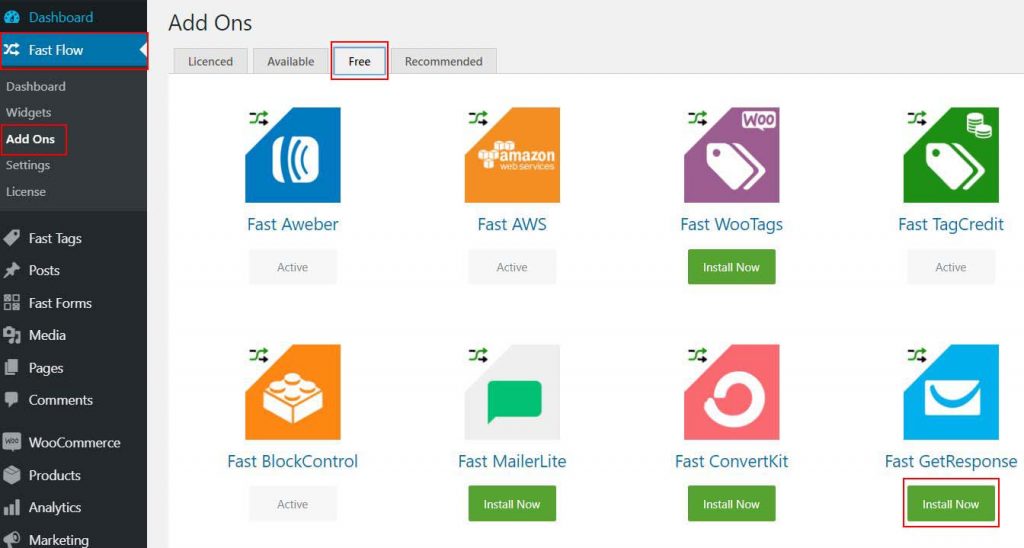
Navigate to the FastFlow add-ons page and click on the Free tab. Click on the Install Now button under the Fast GetResponse.
Step 2
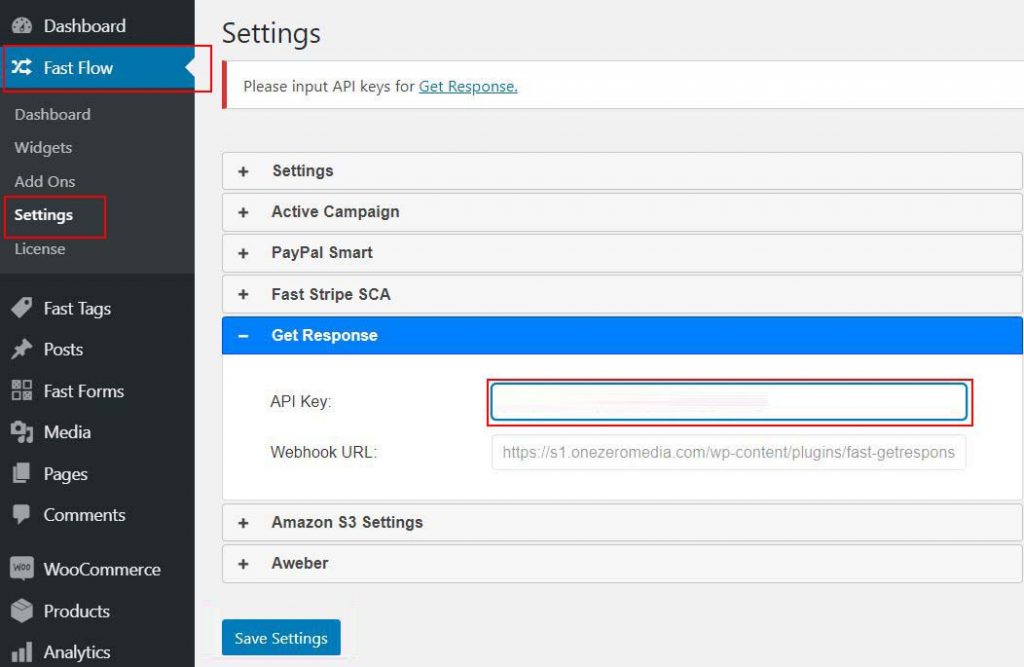
Once installed, go to FastFlow Settings and expand the GetResponse tab and leave the window open and go to your GetResponse account to get the API Key.
How to get GetResponse API Key
Log on to GetResponse, click Menu from the top left then select Integrations and API and then go to API tab, click Generate API Key then copy the code.

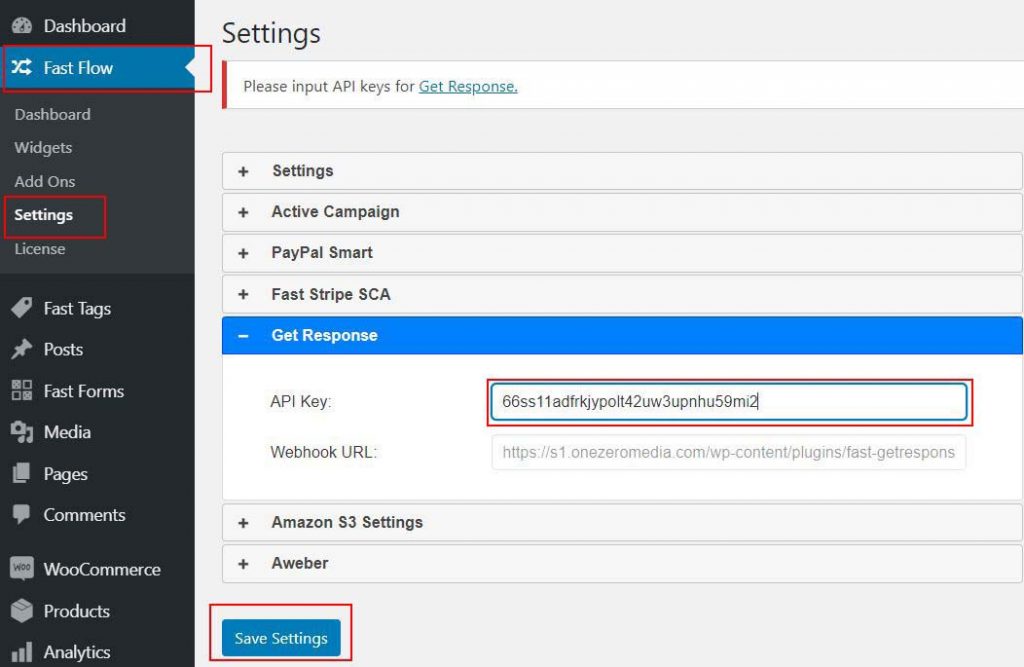
Now go back to FastFlow settings and then click GetResponse and paste the generated API Key to API key field and then click Save Settings.
FastMember is now set up and ready to use GetResponse. You can add any number of products to GetResponse by following these steps.
Step 1
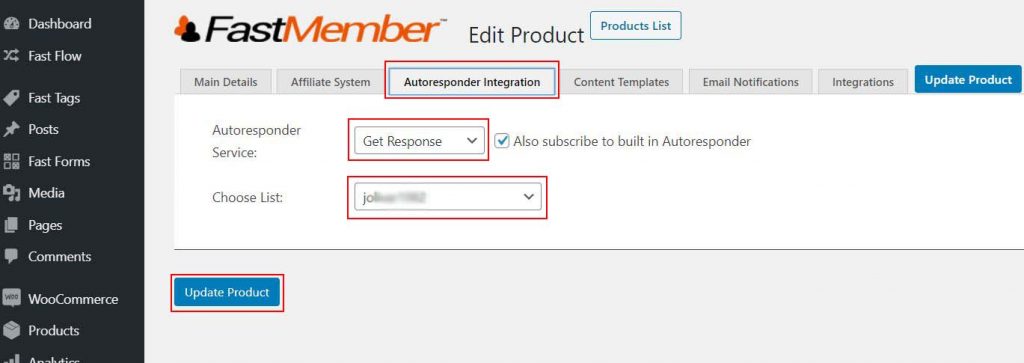
Go to FastMember, click Products List and choose the product you want to integrate with GetResponse.
Step 2
Go to the ‘Autoresponder Integration tab’
Step 3
Select ‘GetResponse’ as the Autoresponder Service and select the list you wish to populate in GetResponse.
Step 4
Optionally, you can synchronize Fast Tags with GetResponse as well. To do that, simply go to the ‘Integrations’ tab, maximize the ‘Fast Tags integration’ section and set the tag
Step 5
Click Update Product when done with the settings.
Testing Fast GetResponse add on
To test GetResponse integration all you need to do is simply do a test sign up on your website. The steps below will guide you through checking the GetResponse Lists after doing a test sign up.
Go to a browser window where you’’re not logged in and complete the signup form or make a test purchase and check the email for confirmation.
GetResponse New user has been added
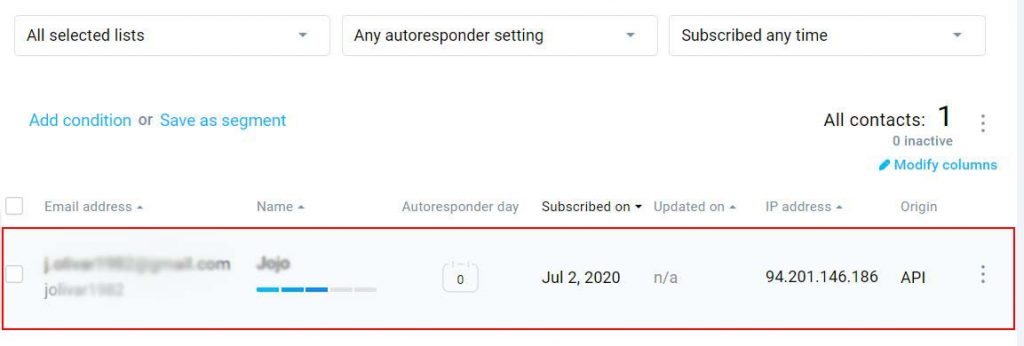
Go to GetResponse, click Menu and then click Lists and you should see a new user added from GetResponse Lists
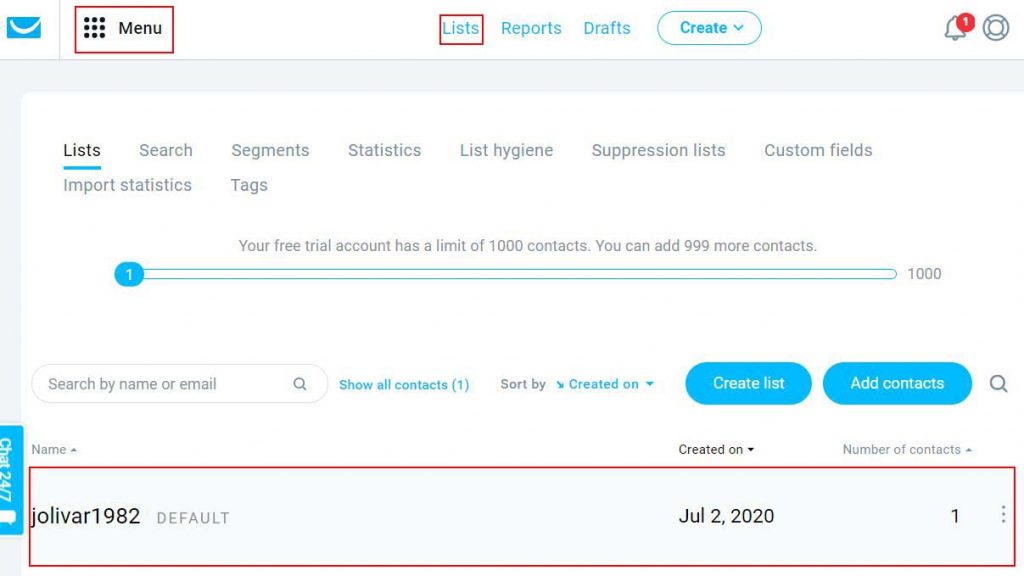
Now go into the List you’ve synced and you’ll see that there’s a new user along with a full name has been added.
If you open that user up you will also see a tag being applied if it was configured on the FastMember product Integration tab when setting up the Autoresponder Integration process.
